Securing My Detached Garage
Adding security to my garage by using an access point, router, a Raspberry Pi, and camera.
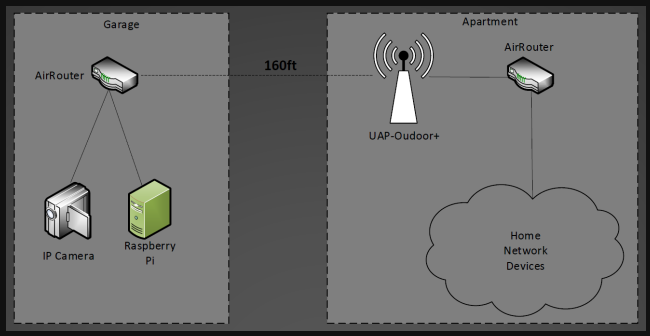
The new apartment complex I recently moved into provided me with a detached garage, however it was quite the distance away from my actual apartment, and I would be uneasy storing anything inside without some kind of monitoring system. So I set upon the task of extending my network into the garage so I could monitor the interior and receive alerts if anything were to happen inside.
Hardware for this project:
- Raspberry Pi
- PIR motion sensor
- Exterior WiFi AP
- Router
- IP camera
According to the measuring tool in Google Maps, the distance between the apartment and garage is about 160ft. The garage is also not in direct line of sight as the WiFi signal will need to traverse through some trees and the corner of a building.
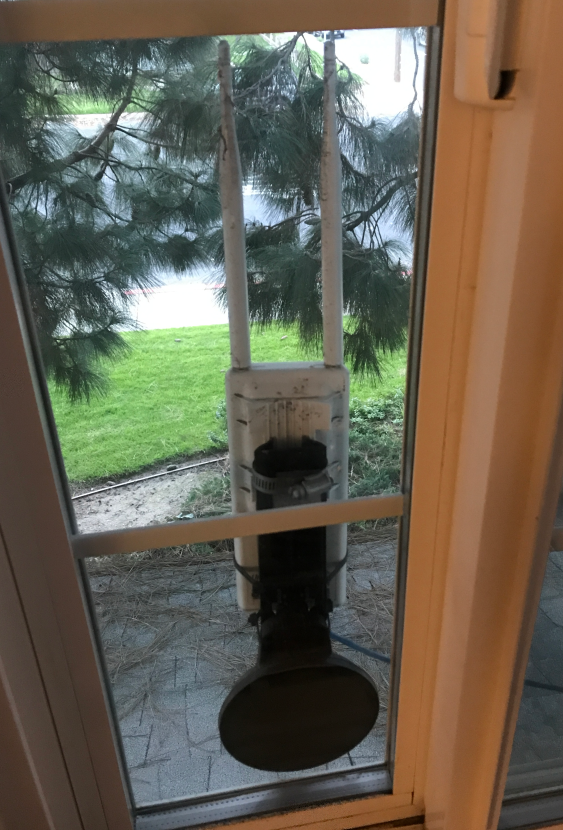
Inside the garage will be another router which will be mounted as close to the exterior wall as possible. An important thing to note is that all of these devices will be operating at 2.4GHz. Choosing 2.4GHz over 5GHz is better in this scenario because of the distance and obstructions involved.
Setting Up The Wireless Devices
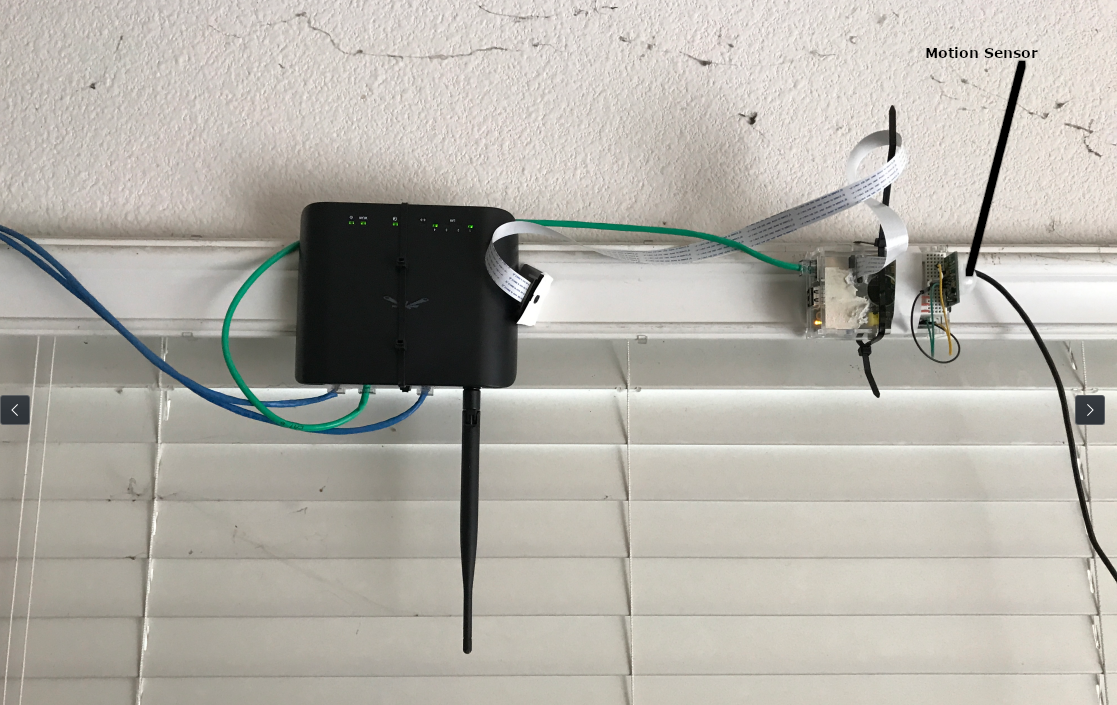
Now that the hardware is mounted and powered up, it’s time to do some configuration. The exterior AP has already been configured as a basic WiFi AP for the devices inside my apartment. All we have to do at this point is setup the garage router and have it connect to the outdoor AP.
The garage router can operate in three different modes:
- Station – Router connects to the remote AP and provides connectivity through its 4 ethernet ports.
- Access Point – Router acts like a standard access point, providing WiFi/ethernet for a home/office environment.
- AP-Repeater – The router connects to a remote AP, provides connectivity through its ethernet ports, and also extends the ESSID, extending the wireless range of a network.
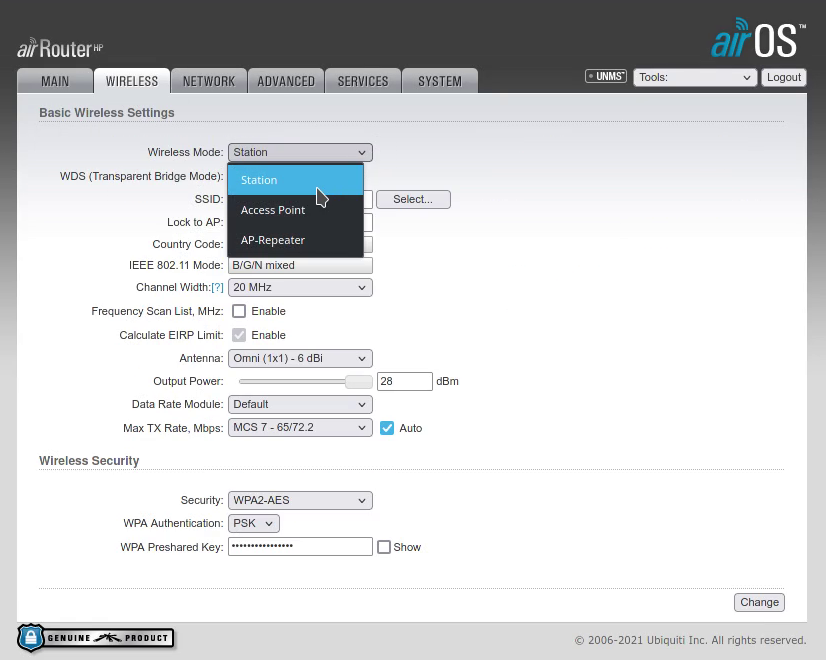
After selecting the operating mode we can now click on the “select” button as seen above. This will bring up a list of nearby access points. Just find that one that you want to connect to and then click “Lock to AP”, and then enter the required credentials.

After entering the credentials the connection came up a few moments later with better signal strength than anticipated!
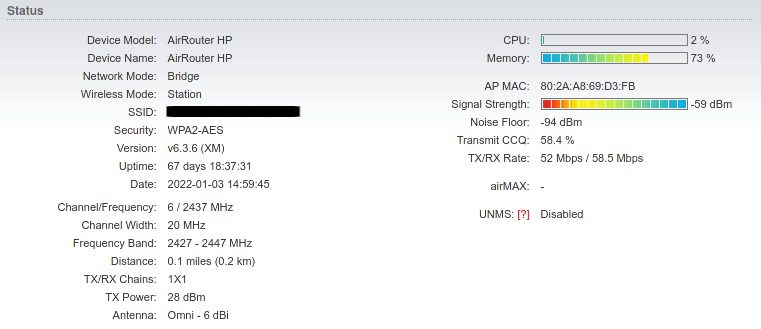
Success, I now have network connectivity!