Raspberry Pi Police Scanner
Record police and EMS activity in your community for later review!
Many large cities like Los Angeles or Phoenix have web based police scanners that enable the public to listen to local law enforcement activities with ease. However, if you live in a small city like me, those types of services usually don’t exist and you’ll need to have your own scanner. But then who has the time to sit around and listen to a scanner all day long waiting for something exciting to happen? Well I sure don’t, but at the same time I still wanted to know what goes on in my community.
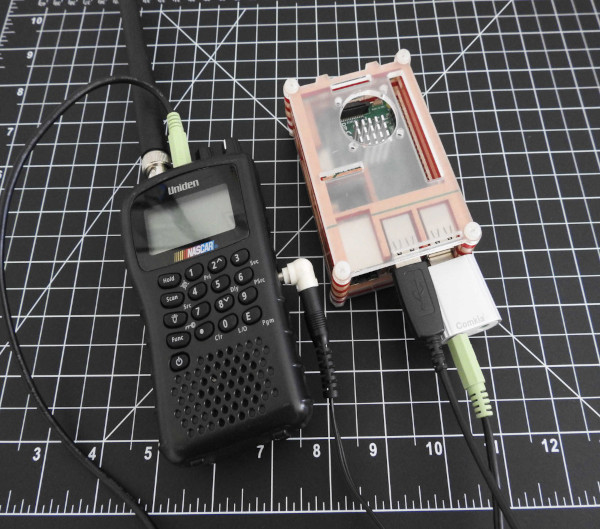
To combat this problem I decided to take an old hand held scanner I had laying around and interface it with a Raspberry Pi. Before getting started I needed some supplies, see below.
- Raspberry Pi + Raspberry Pi OS /w Desktop
- External USB sound card with ‘line’ or ‘mic’ inputs
- Scanner that has an audio jack, preferably 3.5mm
- Audacity (a powerful open source audio application)
Raspberry Pi with Required Accessories
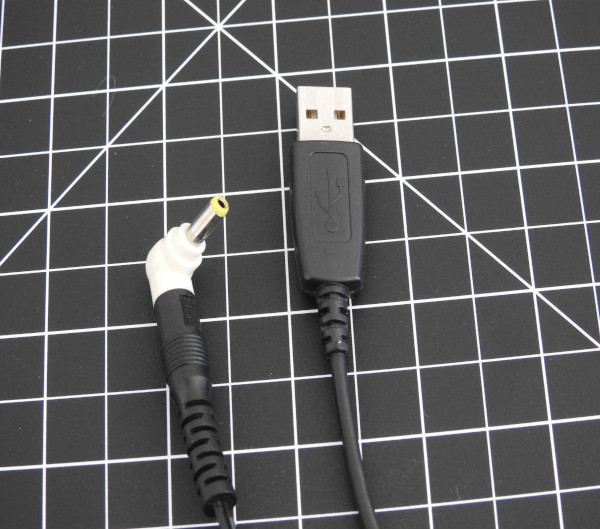
The scanner came with it’s own 5VDC power supply, which I had plugged into a power outlet. Powering it this way introduced an annoying 60Hz hum into the audio recordings. This was unacceptable, so I fabricated a USB/barrel cable to power the scanner from the Pi’s USB port. USB operates at 5V with a max output of about 1A depending on whether its USB2.0/3.0. This is fine because the scanner only needs 5V at about 250mA.
Setting Up the Pi
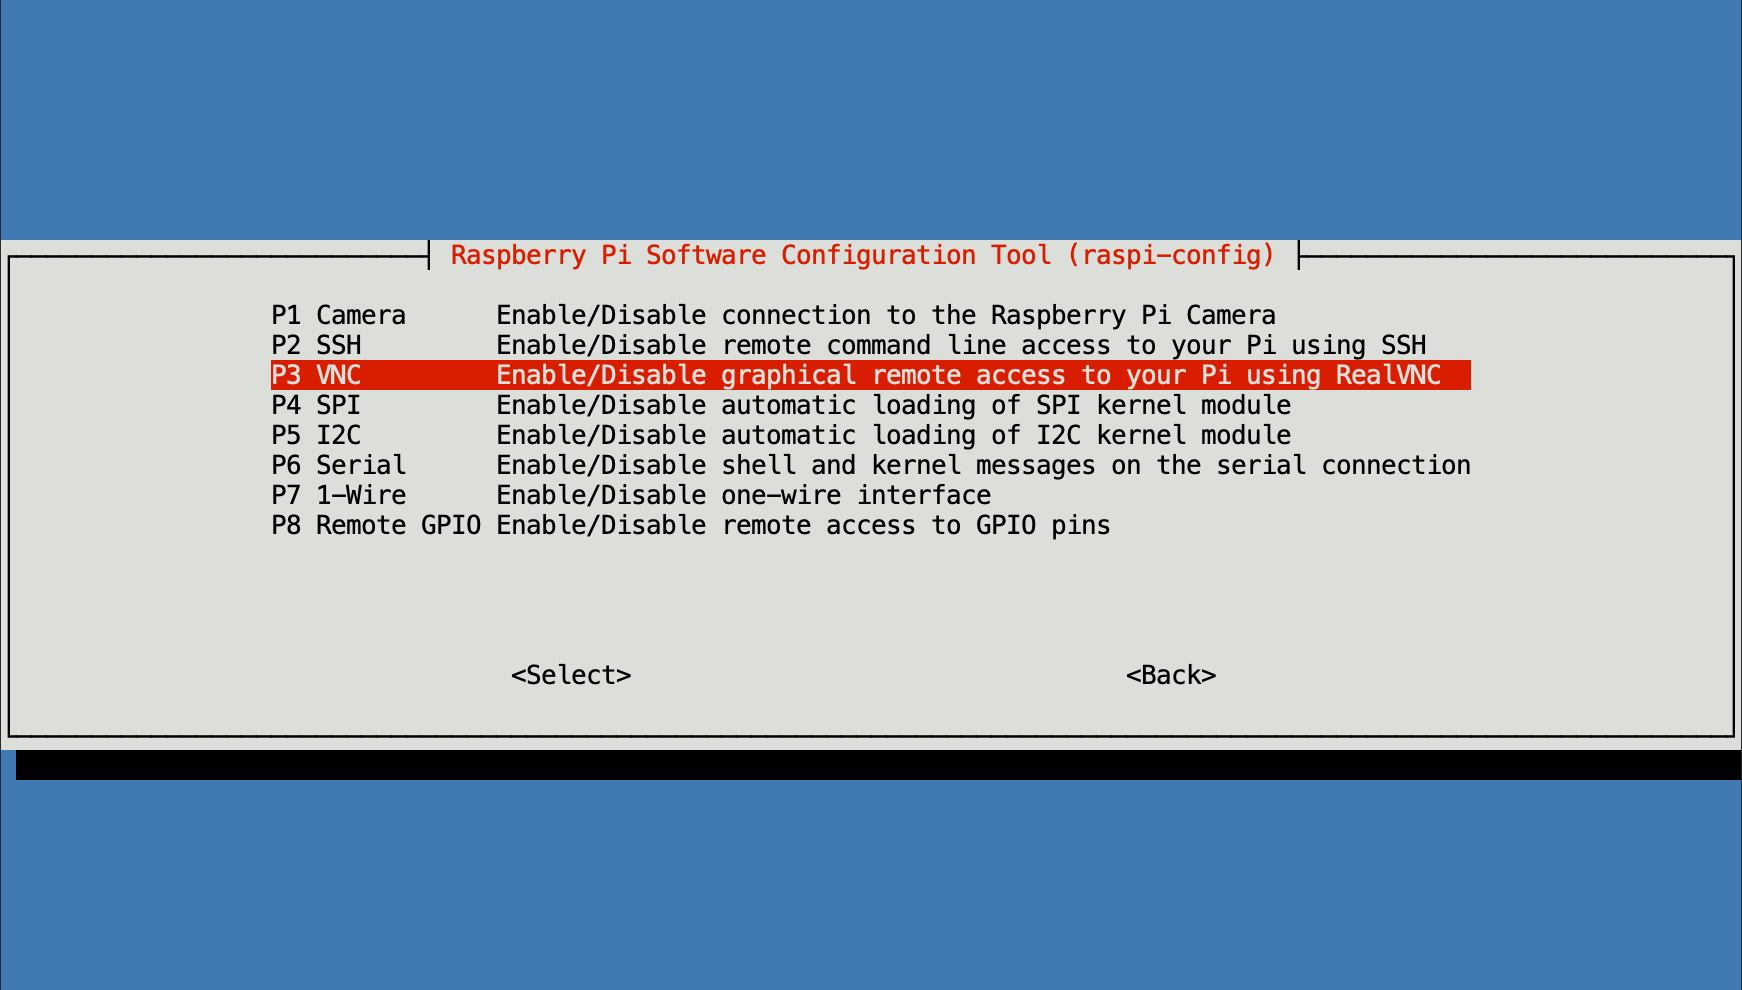
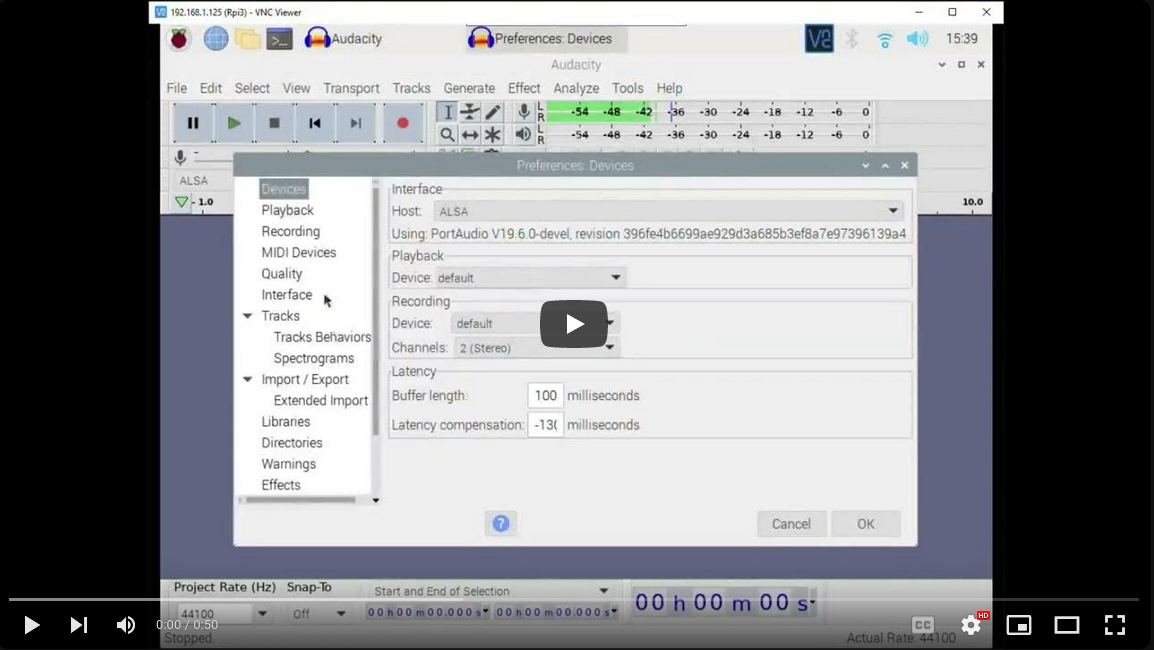
For this to work I needed to be able to use Audacity’s GUI to manage recordings. To make it even easier I could even manage the recordings remotely via VNC. This meant I needed to install the version of Raspbian that came with a desktop. You can find it on the official Raspberry Pi OS download page. After booting up the Pi there are some settings we need to make. VNC access is not active by default and needs to be enabled via the ‘raspi-config’. It would also be a good idea to enable SSH at the same time to make remote management even easier. You can connect to the Pi using the RealVNC application which is available on mobile, Windows, or Linux.
Using Audacity
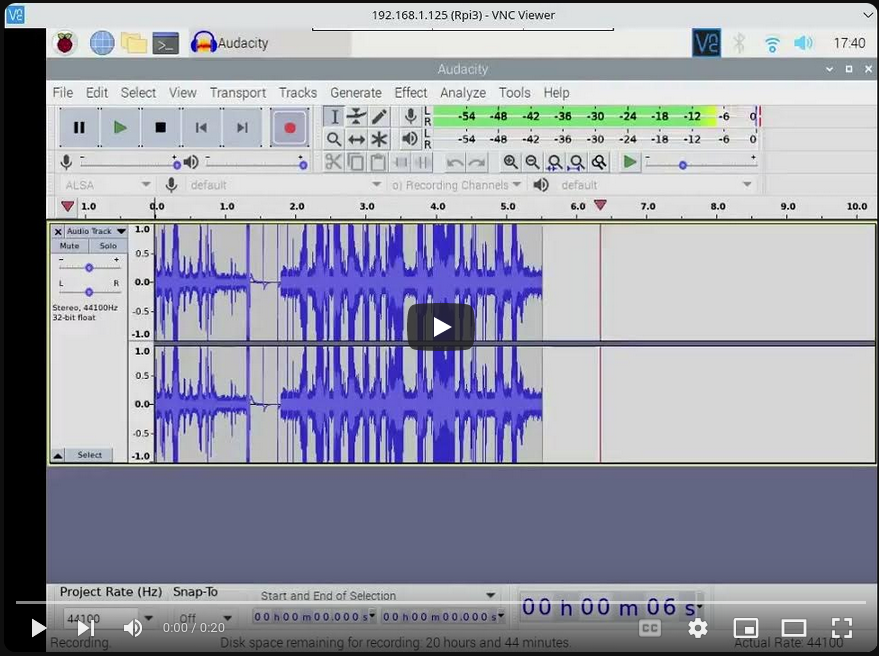
After powering up the scanner and setting the volume to about half way and adjusting the squelch, open up Audacity. Click on the “Click to Start Monitoring” window and you’ll see the VU meter fluctuate based on the noise received from the scanner. Take note of how high the noise peaks so you can set the recording threshold appropriately.
The random noise picked up from my setup peaked at around -36dB. Now I must set the the recording threshold slightly above that, say about -30. After that, save the settings and hit record! You’ll notice it’ll record for a second at first and then stop. Once traffic is received on the scanner recording will start and stop as needed.
Sit back relax, and await your first traffic capture.
I left the setup running for about 9 hours overnight and it captured about 24 minutes of traffic.
On average, I capture about 1.5 hours of traffic a day. Audacity makes it easy to comb through the recordings and pick out stuff that looks interesting, such as a longer than usual transmission which typically indicates that something interesting has happened. After some time you’ll be able to identify traffic patterns which in turn makes it easier to pick out the interesting stuff.
It would be nice at some point to correlate recordings with time stamps, but I have not figured out how to incorporate it yet. When I do, I’ll update this post.