AirPlay With Pi
Setup AirPlay on a Raspberry Pi!
I started to grow tired of turning on multiple electronic devices just to stream music from my phone to my home stereo system. So I decided to look for alternatives that would make this task easier and also save a little on energy costs.
I’ve been thinking about doing this for quite a while and recently pulled the trigger on it. Most of the stuff needed I had laying around in storage bins not doing much good. Parts Needed
- Raspberry Pi (any model will work)
- USB sound card (optional)
- LEDs, switches, resistors, and jumper wire
- Case (optional)
The Plan
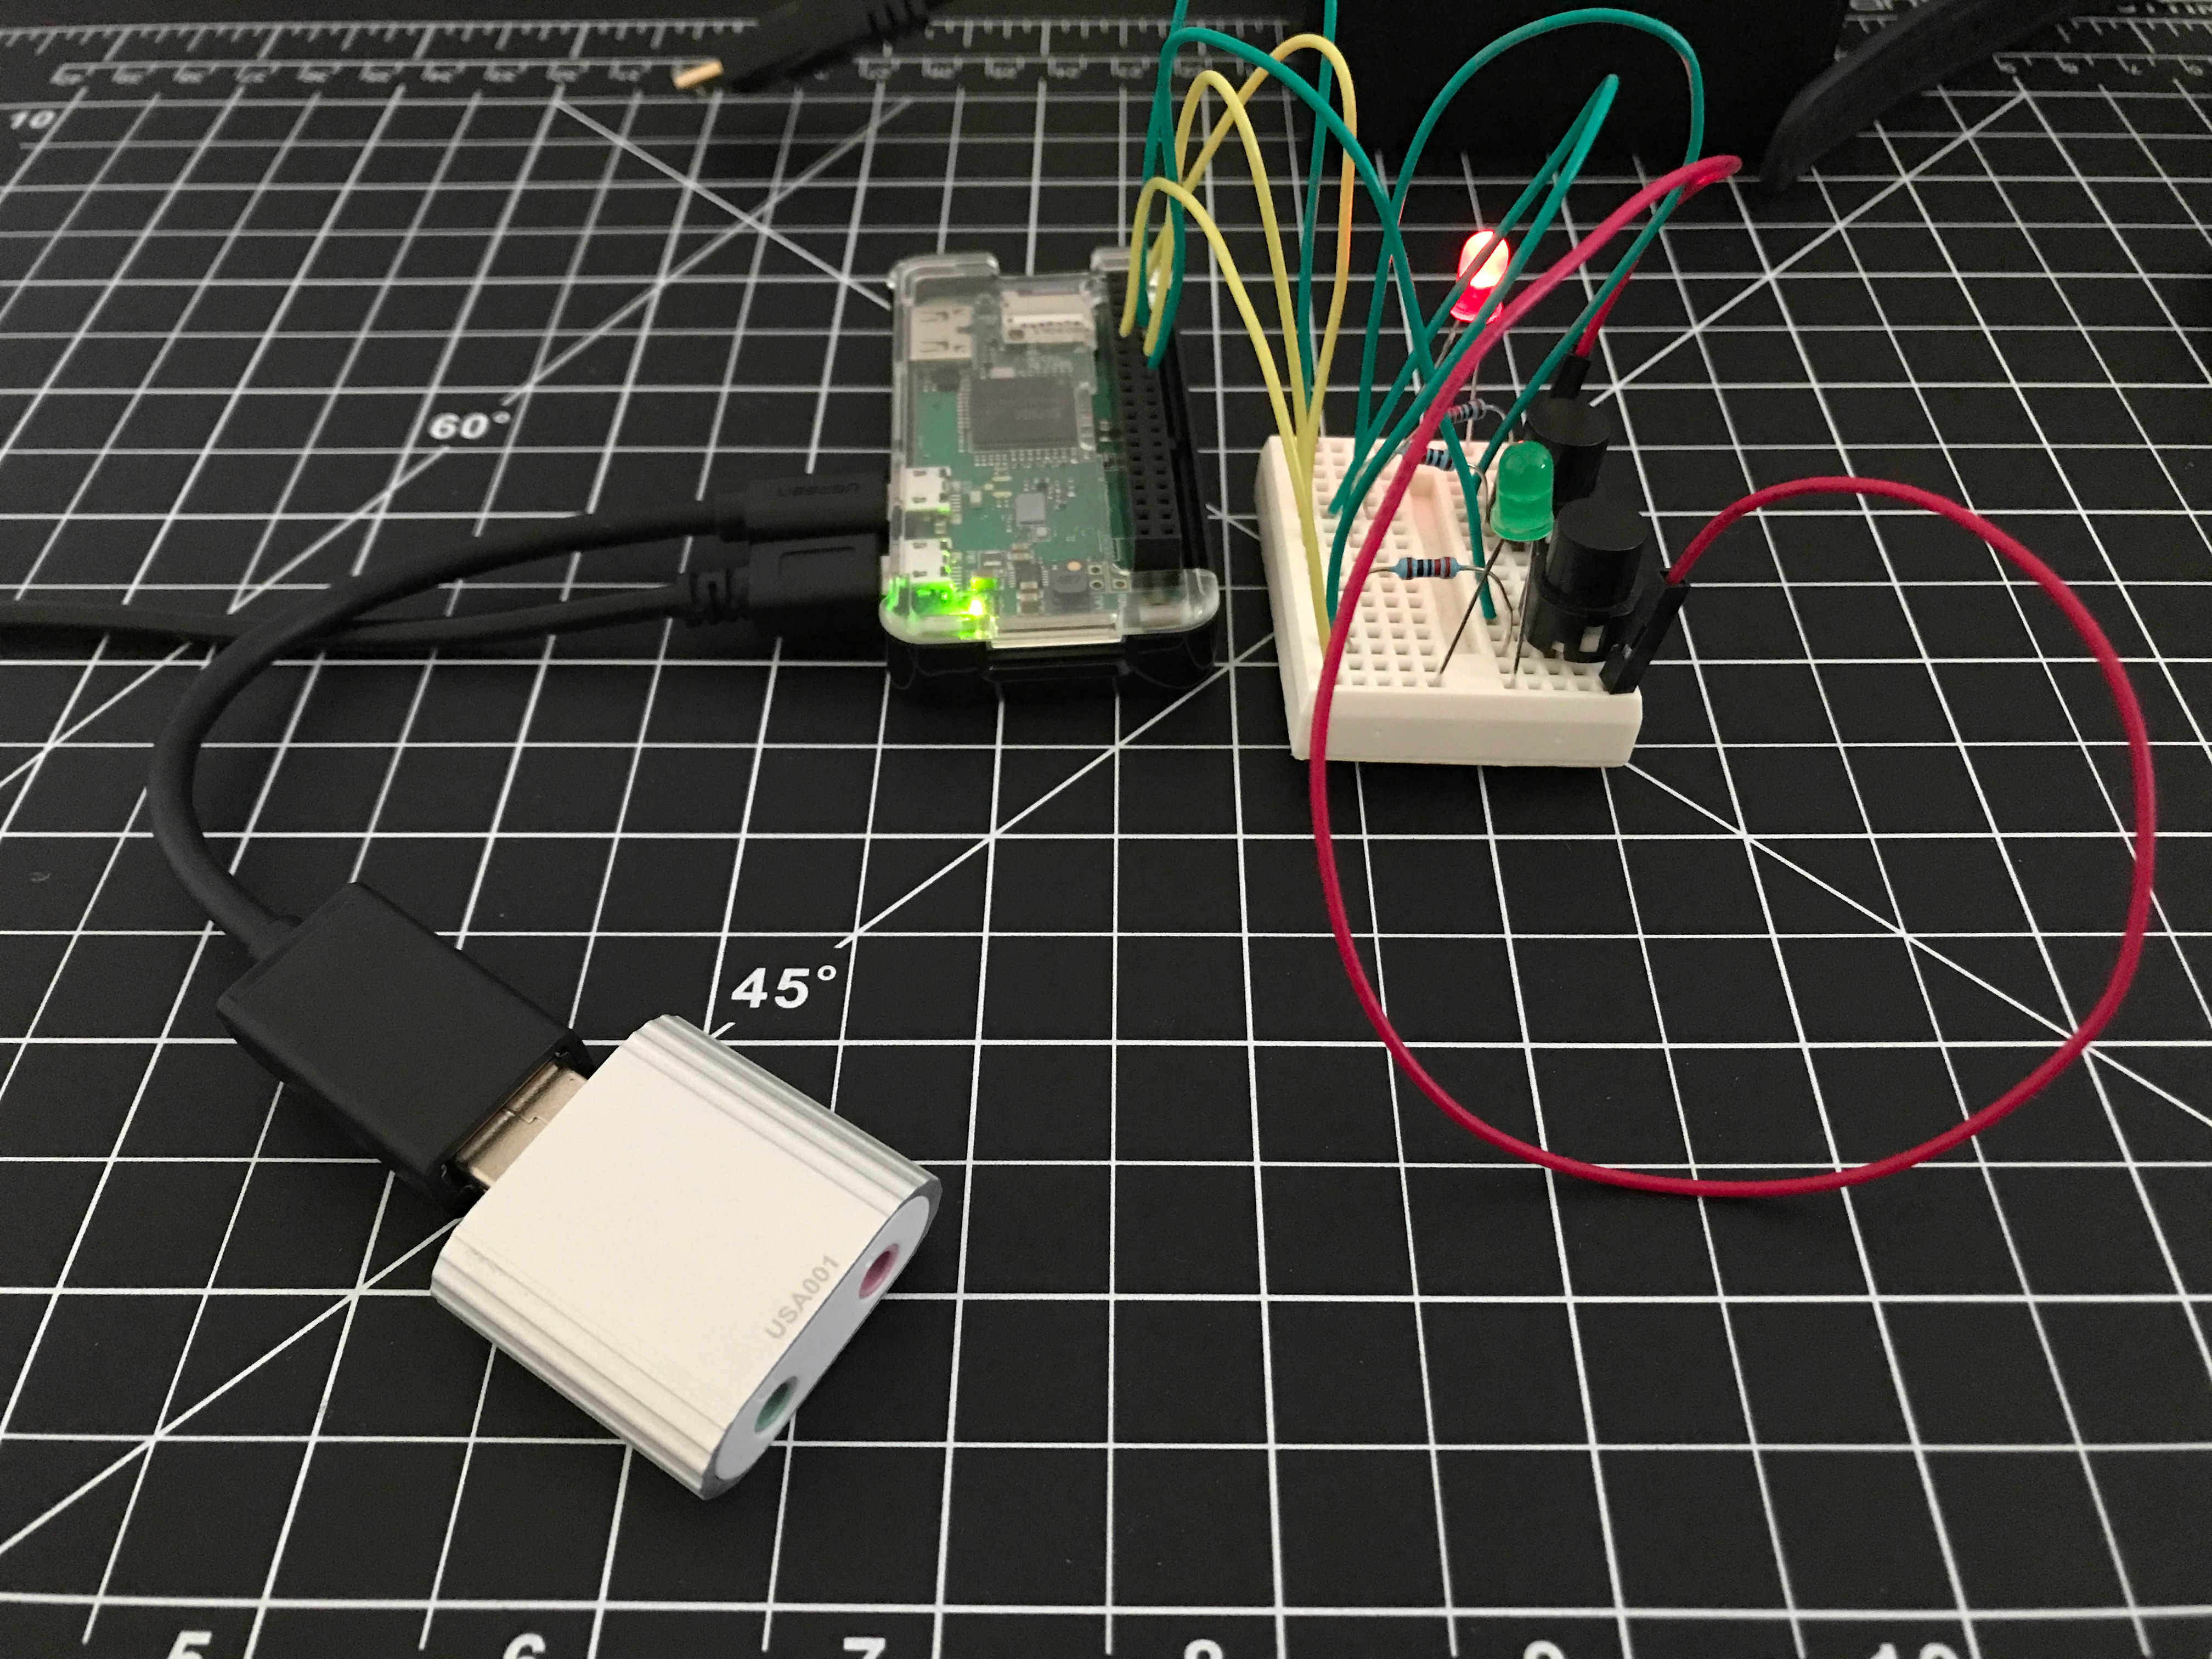
For this project I used an old Raspberry Pi Zero that was just collecting dust, loaded it with the latest version of Raspberry Pi OS, then looked for resources on how to accomplish this task. I found very helpful instructions on Jeff Thompson’s Blog about the software required. I followed his steps to get started and then added some additional features that gave me some additional security.
Since I live in an apartment complex, having a Pi setup and listening for Bluetooth connections all the time isn’t very secure. There needed to be an easy way to turn off and on the service to prevent unknowns from connecting to the device. To do this we will be taking advantage of the Pi’s GPIO pins.
Interfacing With the GPIO Pins
I will be controlling the behavior of the GPIO with a small Python script, but first I need to make all of the necessary connections. The diagram below shows how the components are interfaced.
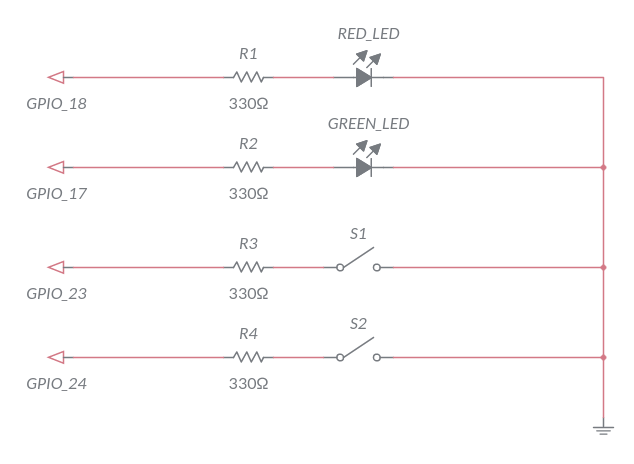
The resistors are in place to protect both the LEDs and the GPIO pins from over current and shorting. Using 330ohm resistors is a little overkill but I didn’t have anything else in my limited supply. Typically 5mm LEDs operate at their brightest when supplied with about 20mA. In this case with the 3.3V provided by the GPIO and the 330ohm resistor, we’re operating at about 10mA which gives us half of the potential brightness, but with double the protection.
Controlling LED and Button Behavior
1
2
3
4
5
6
7
8
9
10
11
12
13
14
15
16
17
18
19
20
21
22
23
24
#!/usr/bin/python
import RPi.GPIO as GPIO
import time
import os
GPIO.setmode(GPIO.BCM) #Defines GPIO pins numbering
GPIO.setup(23, GPIO.IN, pull_up_down=GPIO.PUD_UP) #Sets GPIO 23 as in input and pulls it up
GPIO.setup(24, GPIO.IN, pull_up_down=GPIO.PUD_UP) #Sets GPIO 24 pin as in input and pulls it up
GPIO.setup(18, GPIO.OUT) #Sets the pin as in input
GPIO.setup(17, GPIO.OUT) #Sets the pin as in input
while True:
    input_state = GPIO.input(23)
    if input_state == False:		#If GPIO 23 is pulled low then perform the tasks below
        os.system("./stop.sh")	#Run the stop.sh script which stops the AirPLay service
        print('Service Stopped')	#Prints "Service Stopped" in the terminal
        GPIO.output(17, False)	#Turns off the green LED
        GPIO.output(18, True)		#Turns on the red LED
        time.sleep(0.5)			#Pause for .5 seconds
    input_state = GPIO.input(24)
    if input_state == False:		#If GPIO 24 is pulled low then perform the tasks below
        os.system("./start.sh")	#Run the start.sh script which starts the AirPlay service
        print('Service Started')	#Prints "Service Started" in the terminal
        GPIO.output(17, True)		#Turns on the green LED
        GPIO.output(18, False)	#Turns off the red LED
        time.sleep(0.5)			#Pause for .5 seconds
The script above sets up the GPIO pins as either an input or output, and defines what action to take when the buttons are pressed. Pressing the button attached to GPIO 23 will call on the “stop.sh” bash script which will stop the AirPlay service. The other button attached to GPIO 24 will do the opposite. Lets take a look at one of the bash scripts. It’s important to note that the bash scripts need to be executable.
1
2
#!/bin/bash
sudo systemctl start shairport-sync.service #start stop or restart
I also made the Python program run as a service so it would start automatically when the Pi boots up.
1
2
3
4
5
6
7
8
9
10
#Service Location /etc/systemd/system/
[Unit]
  Description=PiPlay
  [Service]
  Restart=always
  User=root
  WorkingDirectory=/home/pi
  ExecStart=/usr/bin/python3 /home/pi/PiPlay.py
  [Install]
  WantedBy=multi-user.target
Power Up and Testing
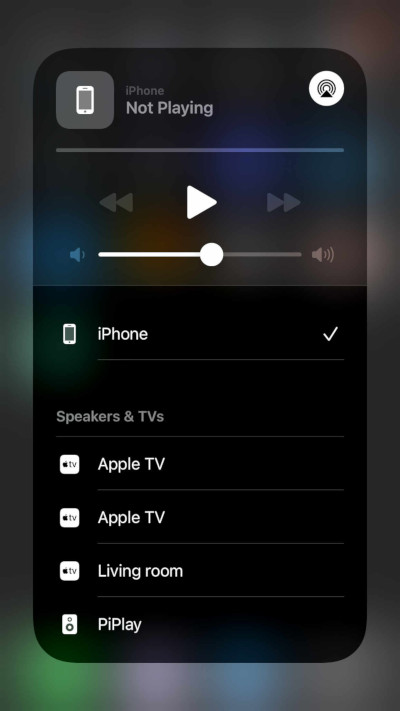
I relocated the Pi to my stereo and plugged it into the aux input, hit the start button and “PiPlay” showed up as a Bluetooth audio selection on my phone!
However, when I tried playing audio nothing came out of the speakers. I later discovered that since I am using an external sound card extra steps needed to be taken.
Additional Steps for External Sound Cards:
Edit the alsa.conf file in /usr/share/alsa/alsa.conf to find and edit the settings so it looks like below.
Edit the alsa.conf file in /usr/share/alsa/alsa.conf and edit the following settings so it looks like below.
1
2
defaults.ctl.card 0 #Change value to 1 for external sound cards
defaults.pcm.card 0 #Change value to 1 for external sound cards
One day I’ll put it in a case so it looks nice on the shelf.